Getting started
From nothing to a real sale. Five steps: create your company, create a store, make sure it has a register, put one product in the catalog, and ring it up. Half an hour, most of which is deciding what to call things.
Each thing hangs off the one before it. A company holds stores; a store holds a register; a register is what a cashier sells from. A store with no register cannot open the till at all — the POS screen just says No registers for this store. Do these in order and you will never meet that message.
1. Create your company
- Go to /signup. The page is headed Create your company.
- Company name — your business as customers know it, e.g. Acme Retail.
- Company id — a short handle, 2 to 48 lowercase letters,
numbers or hyphens, e.g.
acme. Everyone types this when they sign in, and it becomes part of your web address later. Choose something short you will not want to change. - Your name and Work email — you, the first owner.
- Password and Confirm password — at least eight characters.
- Tap Create company.
You land straight in the app as the owner of a brand-new company with no stores in it yet. There is no separate "create an organisation" step — signing up is creating the company.
Signing in afterwards
The Sign in page has three tabs: Email for office staff, PIN for a cashier picking a store and register and typing a 6–12 digit PIN, and Badge for scanning an employee badge. All three start with the company id. Owners use Email.
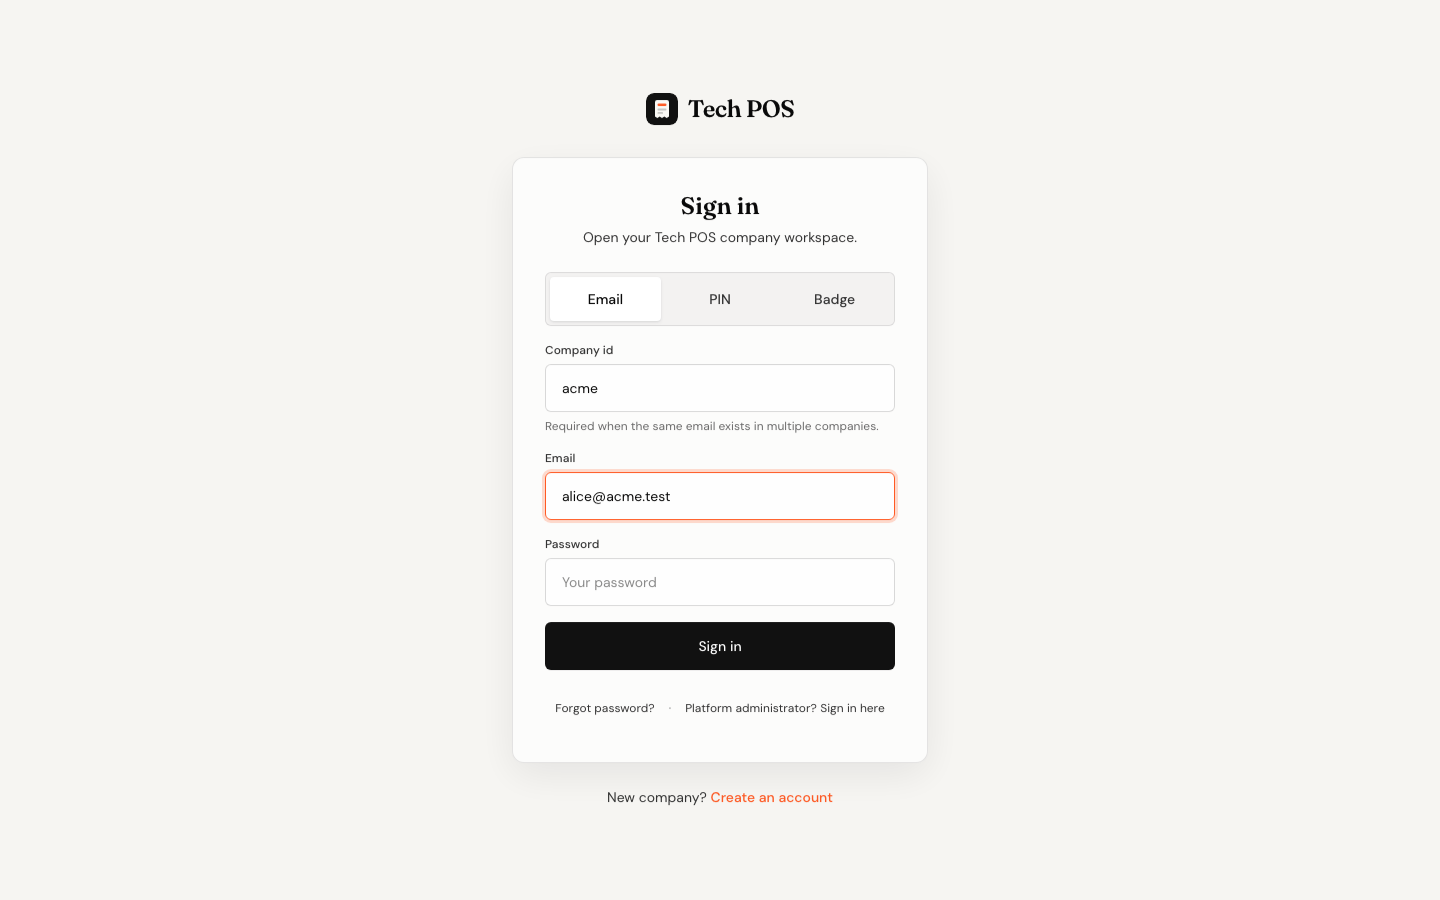
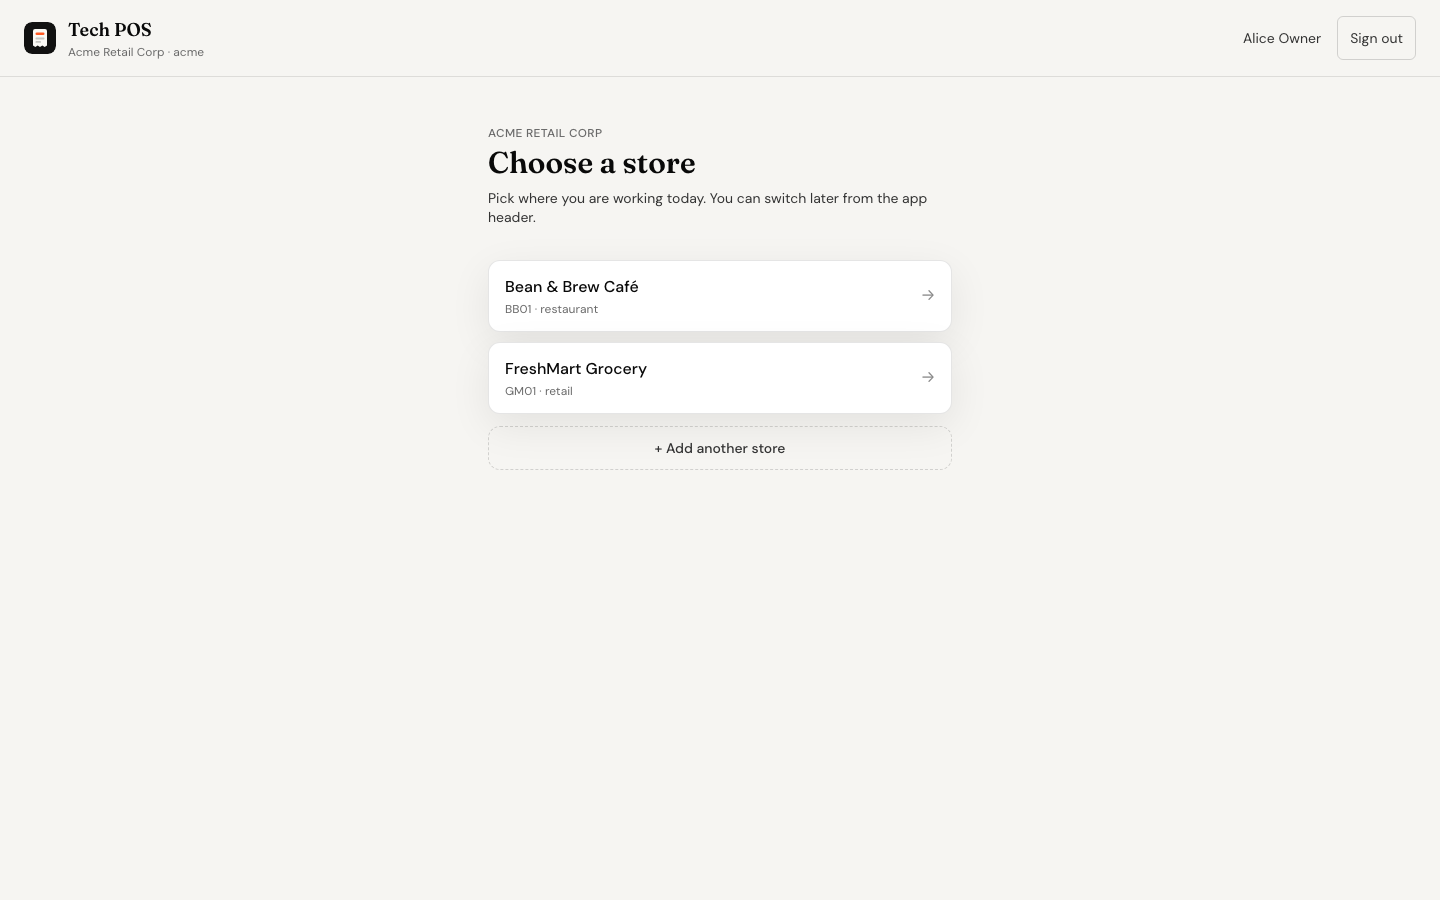
Signing in lands you on Choose a store. Pick where you are working today; the app remembers it on this device, and the store name in the header switches you between them later.
2. Create your first store
A store is one location. Straight after signup the app shows Create your first store and explains why: everything else hangs off it.
- Tap Create store.
- Store name — e.g. FreshMart Grocery.
- Store code — a short code shown on receipts and reports. It fills itself in from the name; change it if you like.
- What is this location? Choose Retail (grocery, convenience, shop floor) or Restaurant (tables, tickets, kitchen). This decides which till a cashier lands on. You can change it later in Settings → Add-ons.
- Set the Timezone and Currency. These matter for reports and prices, so get them right now rather than after a week of trading.
- First register — the name of the till, e.g. Register 1.
- Tap Create store.
Creating a store also creates its first register from that last field, so a store made this way is ready to sell. If it ever tells you the store was created but its register was not, go on to the next step and add one by hand.
3. Make sure the store has a register
A register is a till: one lane, one drawer, one place a sale can happen from. Registers are added from the store picker — the screen you see at /app before a store is chosen.
- If you are already inside the app, tap Switch in the header to come back to the picker.
- Choose the store. You now see Choose a register.
- If there are none, it says No registers at this store — A register is a till. POS cannot open without one. Tap Add register. If there are already some, tap + Add another register.
- Register name (e.g. Register 1) and Register code (e.g. R1) — the code is what shows on reports.
- Tap Add register.
- Pick the register. Your choice is remembered on this device, so the next person to sit down at this machine goes straight to the till.
That is this step, undone. The till has nothing to sell from. Go back to /app, pick the store, and add a register. Note that only owners and managers see the create buttons — a cashier who hits this message needs to ask someone.
4. Add a product
You need at least one thing to sell. Go to Catalog → Products.
- Tap Create product.
- Name — the only genuinely required field. This is what cashiers and reports call the item.
- Kind — Physical for stocked goods, Service for something with no stock like delivery, Subscription for a recurring plan.
- Under Pricing & tax, set the Sell price, and the Tax class if you have set your tax up (see Tax).
- Leave SKU and Barcode blank if you want — both have an Auto-generate … on save tick, so the system mints codes for you. If the item already has a printed barcode, scan it into the Barcode box instead: that is the number the till will look up.
- Tap Create product.
You will see Created "…" and the product appears in the list with its name, SKU, barcode, price and stock. Adding a whole catalog by hand is nobody's idea of an afternoon — Import CSV takes a spreadsheet, and there is a scan-to-import flow for working through a shelf with a scanner. See Products & menus.
5. Take your first sale
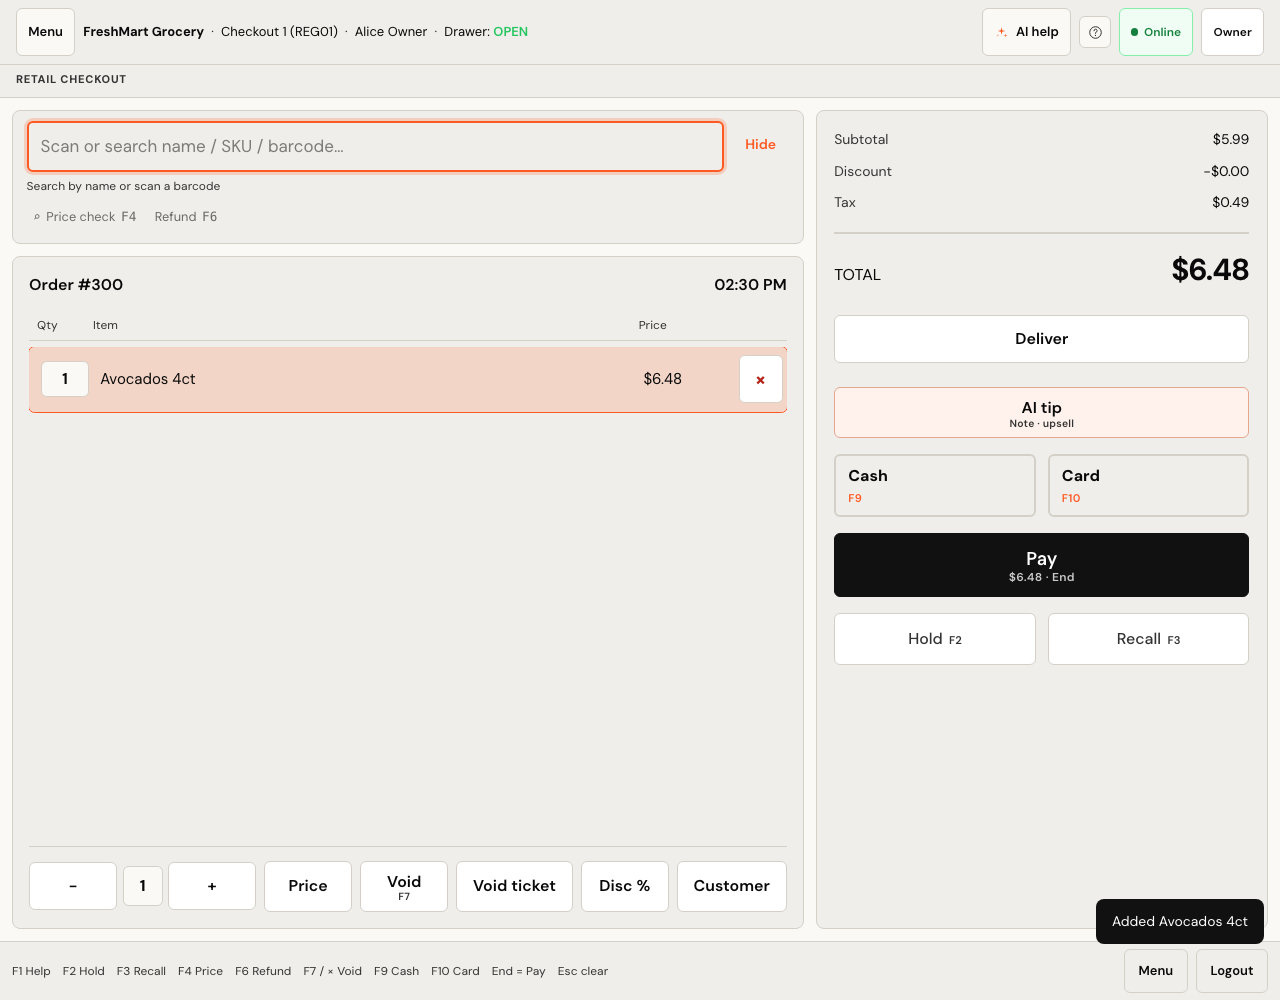
- Go to Sell → POS. The till opens on your store and register — check the top bar names both.
- Type the product's name in the search box and press Enter to add it, or scan its barcode.
- Check the ticket and the TOTAL on the right.
- Press F9 or tap Cash.
- Tap Exact, then Pay.
- The receipt screen appears with Sale complete, an order number and a receipt number. Tap Print to see the printout, or New sale to carry on.
That is a real sale: it is in your orders, in your reports, and against your drawer. Congratulations.
What to do next
Settings → Overview carries a Store setup checklist — open each tab to get this store ready — and it is worth working through before you open the doors:
| Step | Why it matters | More |
|---|---|---|
| Tax | Rates and whether prices include tax. Wrong tax is wrong on every receipt you have printed. | Tax |
| Add-ons | Turn on what this location does — restaurant, delivery, loyalty — and switch retail/restaurant if you chose wrong. | Every feature |
| Floors | Restaurant only: dining areas and tables, before anyone can seat a guest. | Floor & tables |
| Receipt & branding | Your logo, address and thank-you line, with a live preview. | Receipts |
| Hardware & payments | Card payments, terminal provider, scanners. | Hardware |
| Company profile | Organisation name, handle and custom domain. | Companies, stores & registers |
| Users | Who can sign in, and what each of them is allowed to do. | Roles & permissions |
And before the first real trading day, open the drawer with its true float rather than letting the till open one at zero — see Cash drawer & day end.
Adding more stores
A grocery and a restaurant can live under one company. From the store picker at /app, tap + Add another store and fill in the same form. Address, tax, receipts and add-ons are per store; company profile, users and the catalog are shared.