Companies, stores & registers
The shape of the business inside tech-pos: one company, one or more stores, and a till in each. Get this right first and everything else falls into place.
The three levels
| Level | What it is | What belongs to it |
|---|---|---|
| Company | Your business. One sign-up, one login URL, one subscription. | The product catalog, customers, users and roles, the loyalty programme, billing. |
| Store | One physical location. "You can add more later — a grocery and a restaurant can live under the same company." | Its menu, its stock, its tax rates, its receipt branding, its add-ons, its business mode. |
| Register | A till at a store. "Cashiers pick a register before they can sell." | The POS theme and the sales it rings up. |
Brands
There is a fourth level in the data — a brand sitting between the company and its stores, for a group running several fascias. Every store is filed under the company's first brand automatically.
You cannot create, rename or choose a brand anywhere in the app today. It is invisible plumbing. Nothing about running the shop depends on it.
Create the company
Signing up creates the company and makes you its first owner — "Create your company", "Start tech-pos for your stores — you become the first owner."
- Enter a Company name (e.g. Acme Retail).
- Enter a Company id (e.g. acme). This becomes your login web address.
- Enter Your name, Work email and a Password of at least 8 characters.
The company id matters: Settings → Company shows Your login
URL, and "Cashiers open this URL and sign in with email and password
only — no company id." You can also set a Custom domain such
as pos.example.com and point a CNAME at it.
Create a store
- From the store picker (or Settings), press Create a store.
- Enter a Store name. The Store code fills itself in from the name — "Short code on receipts and reports. Letters and numbers only."
- Answer What is this location? — Retail ("Grocery, convenience, shop floor") or Restaurant ("Tables, tickets, kitchen").
- Pick a Timezone and a Currency.
- Name the First register — it defaults to "Register 1".
- Press Create store.
The register is created along with the store on purpose: a store with no register cannot open the POS at all. If the register fails to create, the app says so plainly rather than pretending nothing happened — "Store 'X' was created, but its first register was not… Add one from the store picker."
Add another register
- Open the store picker and choose Add a register.
- Enter a Register name and a Register code ("Short code shown on reports. Letters and numbers only.").
- Press Add register.
Business modes
Each location has one primary footprint, set in Settings → Add-ons under Location mode: "One primary footprint per location — retail or restaurant. POS follows that mode only (no dual Retail/Restaurant toggle). Cafés with tables use Restaurant; counter-only shops may use Retail."
| Mode | What you get |
|---|---|
| Retail / grocery | "Checkout lane; no restaurant floor." |
| Restaurant | "Floor / kitchen — cafés with tables, dine-in, takeout." |
| Clinic | An appointments workspace. It exists in the product but is hidden in the current build: the mode picker only shows Retail and Restaurant, and a clinic location displays as Retail. |
Switching the mode changes the till. Turning the Restaurant KDS add-on on or off switches the location mode with it, which the screen warns about.
There is no dual retail/restaurant till. A shop with a counter and a few tables has to pick: Restaurant gives you the floor plan and the kitchen screen, Retail gives you the scan-and-go lane. If you genuinely run both, that is two stores.
Store add-ons
Settings → Add-ons lists every module with an On / Off / View only state and a one-line description. The header counts them: "N enabled, M off. Turn add-ons on for this store."
| Add-on | What it turns on |
|---|---|
| Purchasing | Purchase orders and receiving (GRN). |
| Promotions | Discounts, deals, and promo rules. |
| Loyalty | Points programs for repeat customers. |
| Gift cards | Sell and redeem store gift cards. |
| Delivery | Delivery fees, zones, and dispatch. |
| Restaurant KDS | Kitchen display and restaurant floor. |
| Inventory advanced | Lots, cycle counts, and deeper stock tools. |
| Departments | Aisles and departments for larger catalogs. |
| Recipes / BOM | Recipes and food-cost bills of materials. |
| Accounting | Journals, periods, and books. |
| Labels | Shelf tags and barcode label printing. |
| Time clock | Staff clock-in and time tracking. |
| Self-checkout | Retail self-checkout and restaurant menu self-order for this store. |
| Clinic | Patients, doctors & fees, visits, lab orders, medicine and a charge sheet — "operational billing, not an EMR or medical claims". |
| Integrations | Webhooks, accounting export, and Slack connectors. |
| AI assistant | In-app help on every tab. "Answers use only what this user can already see and do." |
Four of these — Billing, Opportunities, Business overview and Integrations — are company-wide pages. Their toggle here "only show[s] or hide[s] them in this store's menu"; it does not switch the feature off for the company.
Add-ons your package does not include appear under Upgrade & add-ons with a View billing / upgrade link. Things that are not built yet are locked with an honest note and read Coming soon rather than pretending to be purchasable — quotes/layaway/deposits, the customer display second screen, and the age-restricted checkout interlock.
Store settings you will actually change
Settings has these tabs: Overview, Company, Store / Location, Tax, Add-ons, Receipt & branding, Hardware & payments, Users, and — for restaurants only — Floors. A banner reminds you what applies where: "Location settings (address, tax, receipts, modules) apply to this store only. Company profile and users are shared across stores."
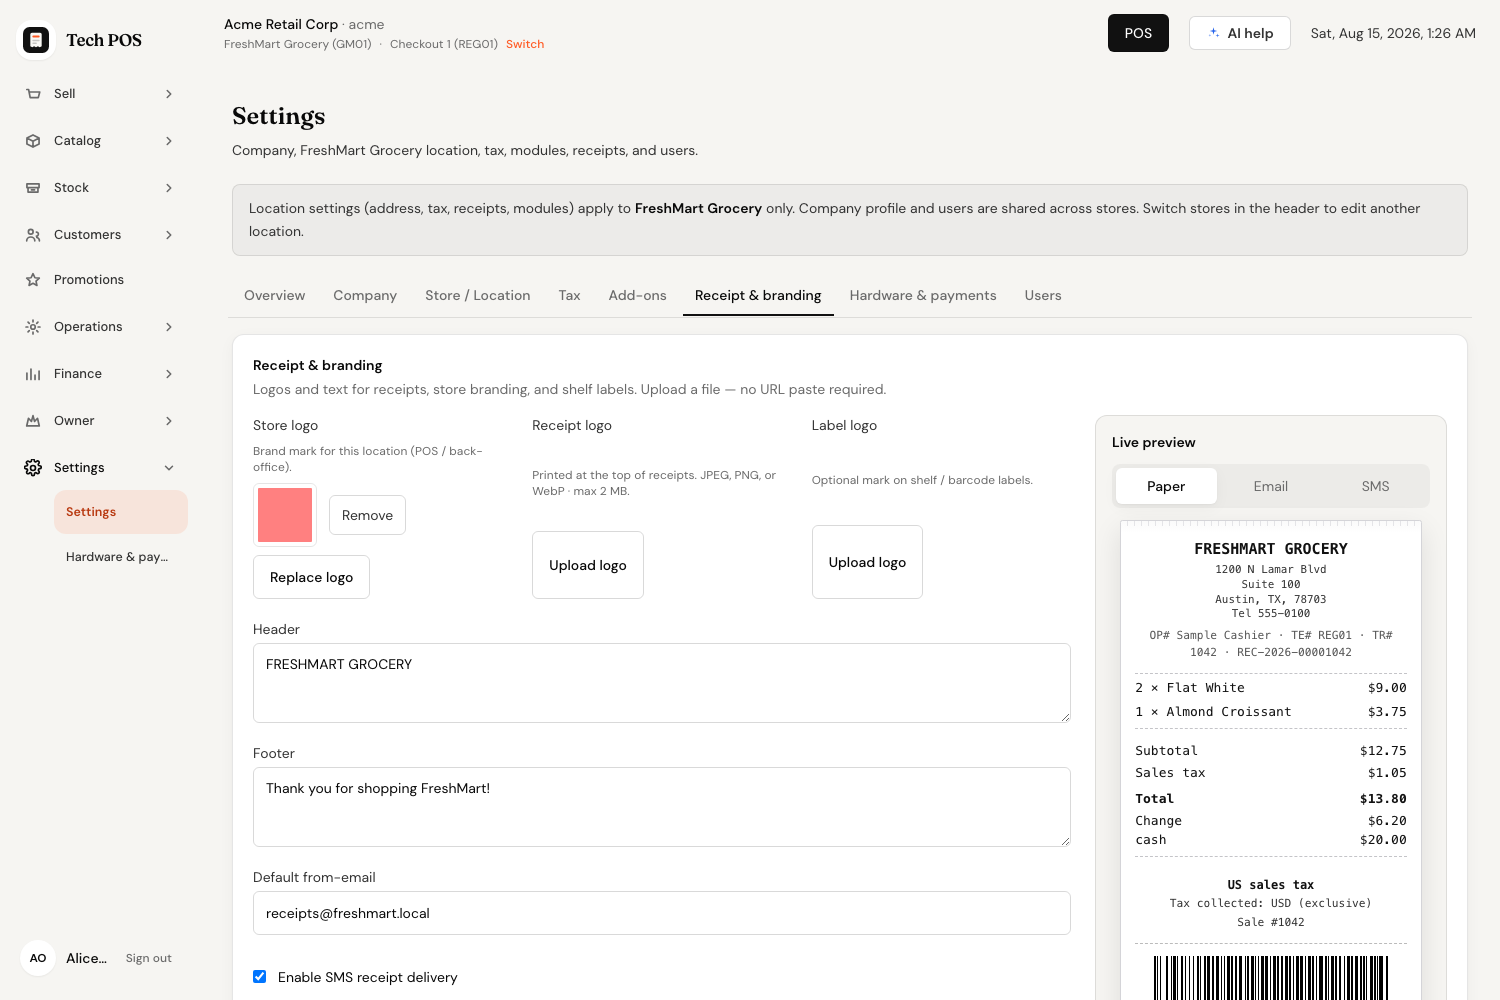
Store / Location
"Address, timezone, currency, and locale for this location only." Address, Phone and Contact email (both printed on receipts so a customer can reach the shop), Timezone, Currency, Locale and a Fiscal profile selector.
The confirmation says it outright: "This does not convert prices or old sales. New transactions use the new currency; completed sales and receipts keep their original currency." A currency change is also blocked while open orders exist.
Inventory & checkout policies
At the bottom of the same tab:
- Allow selling when out of stock — off means the retail till blocks tracked items at zero; on means it lets the sale through and the count can go negative. Either way the ticket shows a warning badge.
- Allow deferred payment (pay later) — "Customer takes goods/food now; balance stays open until collected. Requires a customer on the sale." See Customers & loyalty.
- Allow refunds / returns — off means every refund is rejected for this store.
- Default return window (days) — products may set a shorter or longer one.
Plan limits
Your package caps how many stores, registers and users the company can have. The caps are checked when you create something, not while you are selling, so a busy till is never slowed by them.
Hitting one gives a clear message: "Plan limit reached for registers (3/3). Upgrade your package or contact support."
- Stores — active, non-demo stores.
- Registers — every register across every store.
- Users — active users in the company; some plans cap cashiers separately.
Billing shows the current plan and usage against each limit. Downgrading to a plan smaller than your current usage is refused rather than silently disabling shops.
Inviting users
Settings → Users — "Who can sign in and which roles they have across the company."
- Press Invite user.
- Enter their Name and Email.
- Choose a Role: Org owner, Store manager, Cashier or Inventory clerk.
- Pick the Store they work at. Org owners skip this — "Org owners cover all stores."
- Choose a Password option: Generate temporary password (show once) or Set password (minimum 8 characters).
- Press Create user.
The user is created immediately and no invitation is sent. A generated password appears once in an amber box: "Temporary password (shown once — copy it now)". Once you dismiss it, it is gone and the only way back is Reset password, which generates another one. Hand the password over in person or by whatever channel you already trust.
See Roles & permissions for what each role can do.
Managing people afterwards
The user table shows Name, Email, Badge, Role(s), Status and Actions.
- Change a role — pick a new one from the dropdown on their row, then press Save role. You cannot change your own role; the row says "Can't change your own role."
- Badges — press Assign (or Change) and enter the barcode printed on their badge, at least 8 characters, then Save badge. Clear revokes it.
- Reset password — confirms, then shows a new temporary password once.
- Disable — "They will not be able to sign in." Enable puts them back.
Users are never deleted, only disabled — which keeps their name on the sales they rang up.
Switching store or register
The header shows the company, then the current store and register with a Switch link. Back-office pages act on the selected store, so check the header before you change a price or count stock — that is the single most common "why did that go to the wrong shop?".